What is the IST SWIMCLOCK with Bluetooth?
IST has come out with a brand-new way to control your pace clock. Before, if you wanted to create sets and workouts you did it with a numeric keypad. This worked well, but you couldn’t create very complex sets and you were limited in the amount of sets and workouts that you could store.
IST solved that problem by creating a Bluetooth module that would connect to our pace clock and can be controlled with your smart phone. The module comes either built into a new SWIMCLOCK with Bluetooth pace clock, or as an adapter that you can plug into your exiting pace clock. It allows you to create complex sets and workouts and store them all in your device. You can even create your sets in our WORKWARE software and download them onto your phone.
How Do I Use It?
There are a couple of different ways that you can use your SWIMCLOCK with Bluetooth. The easiest is just the continuous count mode. Just turn the clock on and wait. It will start counting up after a few moments. Alternatively, you can connect your phone app to the clock (see the instruction manual for how to connect) and select the TIMER function on the main screen. If you are using the timer function, you have the ability to start, stop and reset the clock as well as sound the horn on the clock by tapping the HORN button.
EZ Mode
The easiest way to get started programming the clock is to use EZ Mode. Tap on the EZ mode icon on the main menu. Let’s say that you want to do 10×100@1:20. In the REPS box enter “10”. Choose whether you want to count Up (0:00 to 1:20) or down (1:20 to 0:00), in the TO boxes enter the minutes in the lefthand box (“1”) and the seconds in the right hand box (“20”). Tap DONE on the keyboard to hide it. Your screen will look like this:

Click on the START button to start the set. You’ll hear the horn sound, and SR: 1 will appear on the clock for 2 seconds. It will start counting at 3 seconds and will beep again at 1:20, display SR: 2 for 2 seconds and continue counting until all 10 Reps have been completed. Then the clock will stop and go blank.
Creating Sets
Once you are comfortable with EZ Mode, you can create a more complex set. From the main menu tap on Workout Mode, then select SETS.
Sets are organized by category, to make them easier to find. You can make the categories however you want. By distance, by type of set (warmup, aerobic, etc.) or any other way that you want to organize them.
To create a new category, click the menu button (3 vertical dots on Android, box with an up arrow on iOS) and select Add Category. Enter the category name into the box that pops up and tap OK or NEXT to accept it.
Next, select the Category from the set screen, tap the menu button and select Add Set. Type in the set name and tap OK or NEXT to save it.
Now you have your set you can start adding in the intervals. Let’s do a set that looks like this:
2x { 3×100@1:20
{ 4×50@1:00
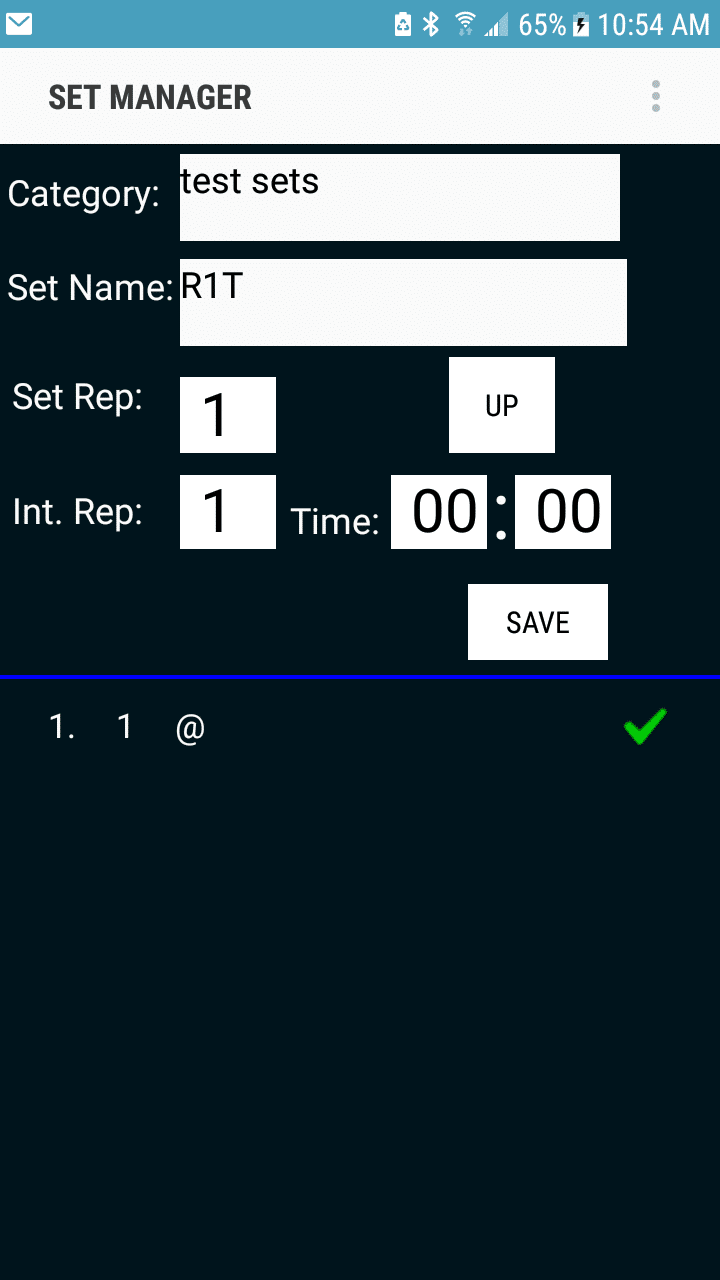
The Set Rep is 2. You can choose to count up or down by clicking on the UP button. The first Interval Rep (Int.Rep) is 3 and the time is 1:20. Once you have entered those numbers, tap SAVE to save the interval.
To add the second interval (4×50@1:00), tap ADD. The Int. Rep is 4, the time is 1:00. Tap SAVE to save that interval.

You now have your set created. Run it on the clock right from this screen by tapping on the RUN button, or combine this set with others to create a multi-level set or a full workout.
Creating Workouts
If you want to have multiple sets run back to back, you can create them as above and then combine them into a workout. The workout will run once through from top to bottom. You have the option of pausing between each set (which requires the coach to start the next set) or just have it run from beginning to end.
To create a workout, from the main menu tap WORKOUTS. Tap the Menu button, ADD WORKOUT and give the workout a name. You can name it after the main set, the date or whatever works for you. Tap NEXT or OK to save it.

Now that you have a workout, you can add your sets to it by selecting the category and set, then clicking the ADD SET button. The set will show up in the list at the bottom in the order that you select it. To change the order, tap on a set, the tap the MOVE button that appears. The sets will be numbered, and you just enter the number of the set that you want to insert the set above.
Running Workouts
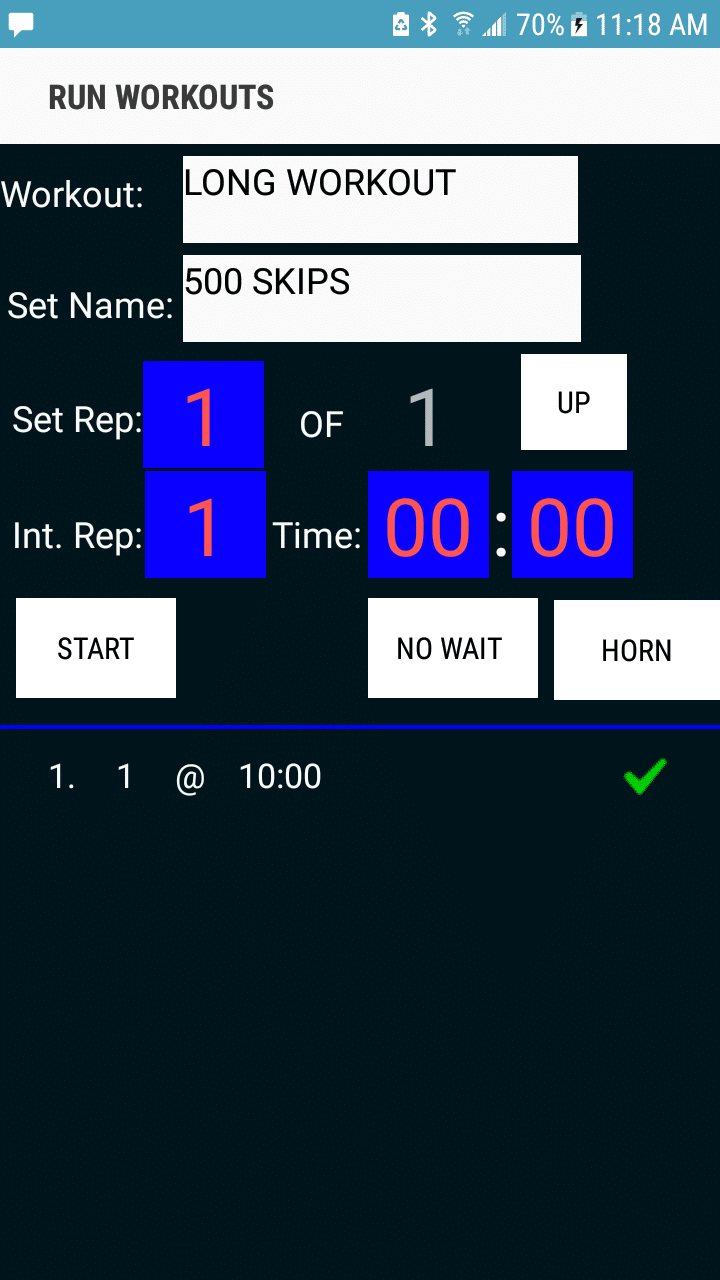
Once you have the workout created, to run the workout tap on WORKOUTS on the main screen, then Run Workout. Select the workout and tap the START button. If you want to start on a different set in the workout, tap the SET NAME and select the set that you want to start on. It’s that simple!
Creating and running sets and workouts for your pace clock is simple. Once you’ve created a couple you’ll be able to do it really quickly. Plus, since they are always there you can just go back and reuse or modify as necessary.
For more information, or to purchase a SWIMCLOCK with Bluetooth or Bluetooth adapter for your existing clock check out our website: https://www.istime.com/products/digital-pace-clock/